What is MocapX?
MocapX is a facial motion capture solution for Autodesk Maya. MocapX app uses iPhone/iPad Face ID technology to capture facial expressions, head movements and eye tracking and seamlessly transfer them to Maya. The data are streamed into any Maya rig or character via blendshapes. MocapX allows animators to work easily with motion capture and achieve better results.
What hardware do I need?
You need an iPhone/iPad with the Face ID technology and Autodesk Maya to work with the animation data. Click here to see a full list of hardware requirements.

Installation
MocapX is available on Windows and MacOS. Version of Maya starts at 2017 and continues all the way to Maya 2020. Click here for more information about installation.
How MocapX works?
MocapX app recognizes and tracks facial expressions, head and eye movements and it can in real-time preview or stream the data into Maya. In a live preview you are able to see a 3D model with tracked expressions. MocapX app allows you to either stream data directly to Maya or record them locally to your phone for later use.
While streaming to Maya you are also previewing the data inside Maya. In general, you can see your performance on a Maya rig with controllers or on models with blendshapes (or the combination of these two).
The motion capture data are recorded into the MocapX format (mcpx file) and can be used later in Maya.
Streaming and Recording
Open the MocapX app, go to Streaming tab (second on the bottom navigation). Now you need to connect iPhone to your computer. You can use either USB or Wifi.
Connection over USB
Simply connect your phone via USB or USB-C cable. Make sure that your computer recognizes your iPhone/iPad. Run Autodesk Maya and create a Realtime Device (MocapX shelf). Under the Real Time Device you will find a connect button. Select USB and click connect. The app shows a green pulsing line that indicates the streaming data in the computer.
*Windows users need to have iTunes installed.
Connection over Wifi
Make sure that your iPhone/iPad is connected to the same network as your computer. Run Autodesk Maya and create a Realtime Device (MocapX shelf). Under the Real Time Device you will find a connect button. Select Wifi and fill the IP address that is shown in MocapX app in the right corner. Now you can click connect. The app shows a green pulsing line that indicates the streaming data in the computer.
Preview data on a 3d model
To preview the data on a 3D face, you can use a rig or a model with blendshape. For a quick start you can use our demo character or skip to the section with explanations of setting up your own character.
Recording
While streaming you can at any time save the data to a file. Data are stored in the MocapX format (mcpx file) and it can be loaded with the Clip Reader.
Recording in Maya works in a way that once you start your connection (USB or Wifi) Maya starts storing data to buffer. Then by clicking on a Save Clip you essentially grab a part of this data and save it to a clip. The amount of data or time which you want to save is controlled by seconds. So, for example you start streaming. One minute passes and you click on a Save Clip button with a 30 seconds set. So you’ve just saved the last 30 seconds of data into a clip. Then you can click again on a Save Clip button with 60 seconds and you’ve just saved the last 60 seconds. That means you will have a clip that contains all of your data from the beginning of the recording to the end.

Offline recording
With MocapX app you are able to record the data locally to your phone without necessarily streaming them to Maya. Data are stored to the same mcpx file and can be used later in Maya. To transfer the data from your iPhone/iPad to your computer, you can simply use whatever sharing way you want, e.g. email, airdrop, dropbox or plug your phone with USB and then copy the files manually.
Here is a quick tutorial on How to record data and share them to your computer.

Rig or blendshapes?
MocapX is unique in a way how you can transfer the motion capture data to you Maya rig or to your model with blendshapes. Also any kind of combination of these two is possible.
Connection to a Rig
To connect the MocapX data to your rig you will need to create a Poses (facial expression) with your rig that will be driven by the motion capture data. The process is straightforward as you have to recreate with your rig a pre existing set of facial expressions. Once you are ready you can click on Auto Connect and MocapX will automatically connect your Poses with MocapX data.
Connection to Blendshapes
To connect the MocapX data to your model with blendshapes you will just need to make a simple direct connection between MocapX Real Time node (or Clip reader) to you blendshape node.
How to prepare Poses with Maya rig?
PoseBoard is a MocapX editor where you can see a list of all expressions with a visual description. Before you can create your first Pose, you need to add all controllers of a rig into an attribute collection. The attribute collection is a Mocapx node that stores all of the information about your rigs controllers. To start out just simple select all of your facial controllers and click on an icon of attribute collection. Now attribute collection is created. Next you can create a first Posein PoseBoard editor by clicking on a plus icon.
PoseLIb editor
The PoseLib editor manages all of your poses and allows you to connect the MocapX data to Poses. You can also create, edit and delete the pose in the PoseLib editor.

How to prepare blendshapes?
Preparing the blend shapes for MocapX is a process of modeling or sculpting your geometry to match the MocapX predefined expression. The visual list of expressions can be seen in a PoseBoard editor or on the Documentation page.
How to work with MocapX data?
Once you capture the motion capture data to a clip, you can start working on polishing the animation. MocapX allows users to animate over MocapX data. You can simply create a keyframe animation with a selected controller. For more information see a tutorial here.
Another way how you can tweak the animation is to bake the animation first. For this, use our MocapX Bake tool. Then you can work with the data as a standard Maya keyframes. You can do the animation in a graph editor or use animation layers. Also using various filtering methods can quickly speed up the polishing.
FAQ
Most frequently asked questions and answers
MocapX runs on every iPhone and iPad with iOS 14. Please note that facial tracking is only supported on devices with FaceID. Click here for a full list of hardware features. MocapX is also available on Android phones where the sliders and joysticks can be used.
Yes, of course. The MocapX app and plug-in were created for animators to speed up the animation process. You can use the MocapX plug-in for any commercial and non-comercial projects. If you do anything interesting in MocapX, let us know and we will be happy to share.
Please note that more complicated rigs may decrease real-time performance depending on your computer’s processing power and graphics card. However, MocapX data is captured and saved at a full 60 fps.
Facial tracking in the MocapX app uses Apple’s Face ID technology to capture facial expressions and transfer the data directly to Maya. This is a paid feature in the application and is only available for devices with Face ID capability. Click here for a full list of hardware features.
Generally speaking, yes! You can connect MocapX data directly to your rig controller or use PoseLib to drive multiple controllers on your rig. We provide demos as well as a tutorials and other useful information.
Sliders and joysticks are available in the free version of the MocapX app and allow you to control objects and attributes in real time in Maya. You can record live action sequences and save them as animation clips for later use – for example, you can animate a car or plane just by rotating your phone.
Mocapx is available for Android. However, only the sliders and joysticks feature. Facial capture is in the works but the technology doesn’t yet allow capture in the quality we want to deliver to our users.
Tutorials
Basic
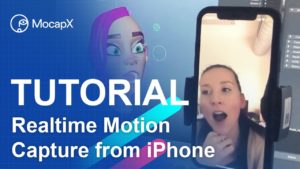
01/ Getting started with MocapX
Learn how to quickly setup MocapX

02/ Pose library
Learn how to work with pose library

03/ macOS Installation
Learn how to install MocapX on macOS
Advanced

04/ Head connection
Learn how to connect head
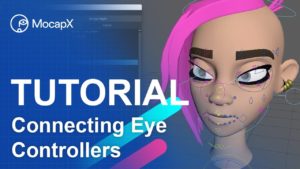
05/ Eye connection
Learn how to connect eye
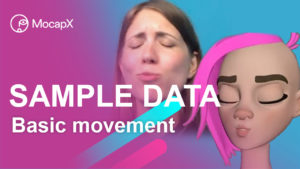
06/ Sample data
Download sample data and project files
Example
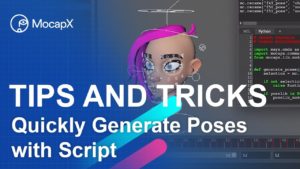
07/ Tips and Tricks
Learn how to quickly generate poses
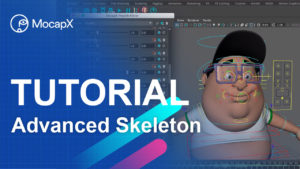
08/ Advanced Skeleton
Using Advanced Skeleton With MocapX
Get the MocapX App and Plug-in
Download MocapX – it’s free
MocapX App iOS
- Real-time facial capture
- Head movement & Eye tracking
- Live preview with 3d character
- Offline recording to device
- Multidevice suppport
- Keypad animation feature
- Wifi and USB support
Offers In-App Purchases:
from US$19 to US$299 for Unlimited PRO version.
MocapX Maya Plug-in
- Real-time facial capture
- Non destructive workflow
- PoseLib editor
- Recording facial data to clips
- Baked and baked to rig controls
- Windows and Mac support
- Maya 2017, 2018, 2019.1, 2020
Windows 10, MacOS


